The digital equivalent of a mountain of paperwork was piling up on Sarah’s screen. As a top-performing sales development representative, she had just hosted a wildly successful webinar, generating hundreds of new, qualified leads. The good news? Her pipeline was overflowing. The bad news? The follow-up process was a soul-crushing exercise in generic, copy-pasted emails. She knew from experience that a personalized video message could cut through the noise and triple her response rate, but the thought of manually recording hundreds of unique videos was a logistical nightmare. It was the classic sales catch-22: the very thing that would guarantee success—genuine, one-to-one connection—was made impossible by the sheer scale of that success. This is a challenge that cripples revenue teams everywhere. Data from McKinsey shows that personalization can lift revenues by 5-15%, yet most teams lack the tools to implement it beyond using a {{first_name}} token in a mass email.
What if you could break this trade-off? Imagine a system that operates with the efficiency of automation but with the personal touch of a bespoke, handcrafted message. This isn’t science fiction; it’s the power of combining a Retrieval-Augmented Generation (RAG) system with the marketing automation prowess of HubSpot and the cutting-edge AI video generation of HeyGen. This automated engine can analyze a lead’s data within HubSpot, use a RAG system to understand their specific needs and pull relevant information from your knowledge base, generate a unique and compelling video script, and then create a polished video featuring a digital avatar—all without a single manual click. The result is a hyper-personalized video follow-up, delivered at scale, that speaks directly to each lead’s pain points and interests. In this technical guide, we will walk you through the exact steps to architect and build this powerful sales automation workflow, transforming your follow-up process from a volume game into a precision-driven conversation starter.
Architecting the Hyper-Personalization Engine
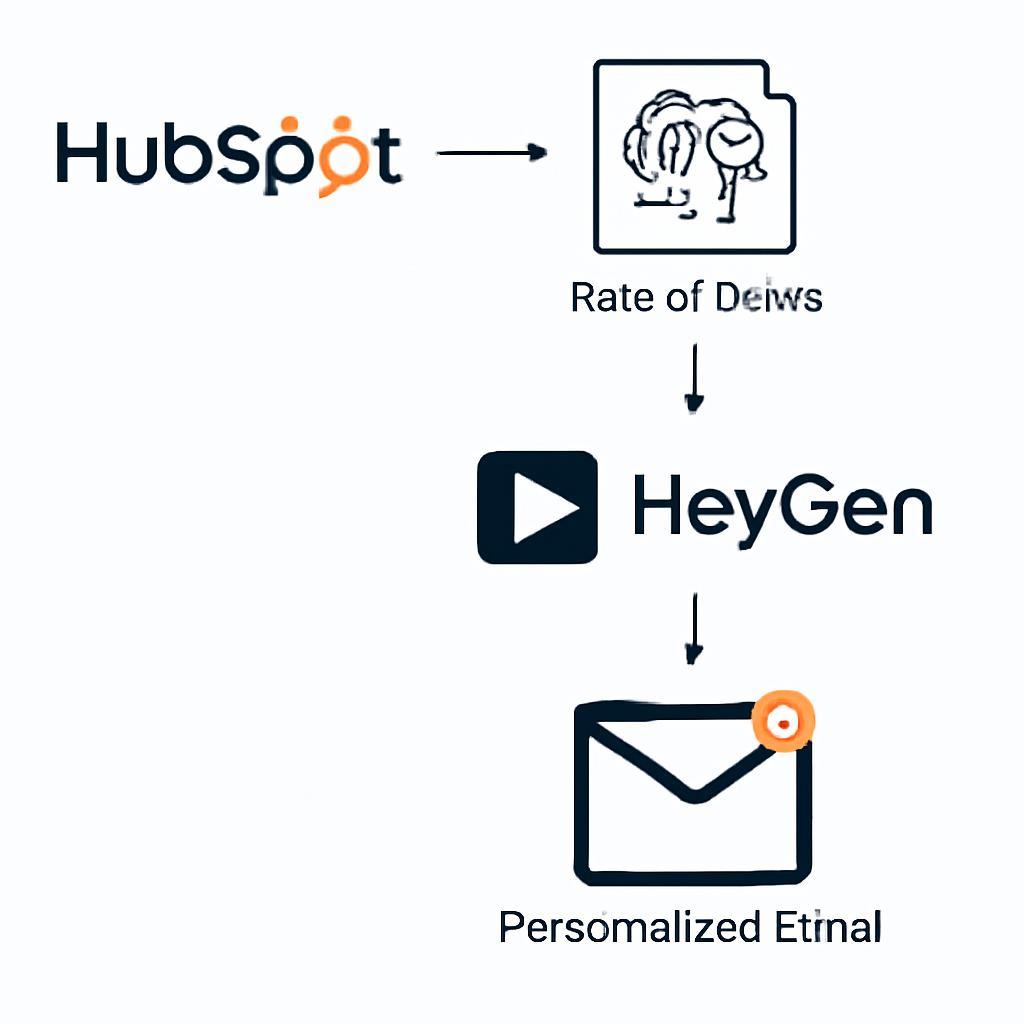
Before diving into code and API calls, it’s crucial to visualize the architecture of our automated system. A well-designed workflow ensures data moves seamlessly between platforms, creating a reliable and scalable solution. At its core, this system is a carefully choreographed dance between three key players.
The Core Components
The entire operation hinges on the successful integration of three powerful platforms:
1. HubSpot: Our central nervous system. It serves as the data repository for all lead information and the orchestrator of the workflow, triggering the entire process and delivering the final, personalized message.
2. RAG System: The intelligent brain of the operation. This custom-built application will receive lead data, use it to query a specialized knowledge base (like product documentation and case studies), and prompt a large language model (LLM) to generate a deeply personalized script.
3. HeyGen: The public face of our automation. Its API will take the RAG-generated script and transform it into a high-quality video, complete with a consistent brand identity and a lifelike AI avatar.
The Data Flow Explained
Understanding the sequence of events is key. The process is initiated by a specific action in HubSpot and flows logically from one component to the next:
- Trigger: A lead in HubSpot meets a predefined condition, such as their lifecycle stage changing to “Demo Attended.”
- Webhook Action: The HubSpot workflow immediately sends a webhook containing the lead’s contact properties (name, company, job title, and custom fields like “Primary Pain Point”) to our RAG application’s endpoint.
- RAG Processing: The RAG system parses the incoming data. It uses the lead’s specific pain point to query its vector database, retrieving the most relevant product features, case studies, or competitor comparisons.
- Script Generation: This retrieved context, along with the lead’s personal data, is fed into an LLM via a structured prompt. The LLM then generates a unique, 45-second video script that directly addresses the lead’s situation.
- Video Creation: The script is sent to the HeyGen API. HeyGen uses a pre-configured video template to generate a new video with the custom script and returns a video ID.
- Update HubSpot: Our application polls HeyGen for the video status. Once the video is ready, the application retrieves the shareable URL and uses the HubSpot API to write it back to a custom property on the original contact record.
- Email Delivery: The HubSpot workflow, which was waiting for the custom property to be updated, proceeds to the next step: sending an email that includes the personalized video link.
This closed-loop system ensures that every qualified lead receives a follow-up that feels like it was made just for them, minutes after they’ve taken a key action.
Step 1: Preparing Your HubSpot Environment
Your automation is only as good as the data that fuels it. Properly configuring HubSpot is the foundational step to ensure your RAG system has the right context to generate truly personalized scripts. Garbage in, garbage out.
Creating Custom Properties for Personalization
Standard contact properties like name and company are just the starting point. To unlock hyper-personalization, you need to capture the ‘why’. Create custom properties in HubSpot to store crucial context your sales team gathers during discovery calls.
Go to Settings > Properties and create new contact properties such as:
* primary_pain_point (Text Field): E.g., “Struggling with low team productivity.”
* key_product_interest (Dropdown): E.g., “Project Management Module,” “Analytics Dashboard.”
* mentioned_competitor (Text Field): E.g., “Currently using Asana.”
Training your sales team to diligently fill out these fields is critical. This structured data becomes the raw material for your RAG system’s query.
Building the HubSpot Workflow Trigger
Next, build the workflow that will initiate the process. Navigate to Automation > Workflows and create a contact-based workflow.
For the enrollment trigger, select a specific, high-intent action. For example:
* Contact properties | Lifecycle stage | is any of | SQL
* Form submissions | Contact has filled out | Demo Request Form
This ensures the automation only runs for leads who are genuinely engaged and for whom you have sufficient data.
Setting Up the Webhook
This is where HubSpot hands off the baton. In your workflow, add a new action and select “Send a webhook.”
- Method:
POST - Webhook URL: This will be the public URL of the API endpoint for your RAG application (we’ll build this next).
In the webhook settings, choose to include all contact properties or, for better efficiency, select only the specific properties you need: First Name, Company Name, Email, and your newly created custom properties (primary_pain_point, etc.). HubSpot will send this data as a JSON payload to your application, kicking off the magic.
Step 2: Building the RAG-Powered Script Generator
This is the core of your personalization engine. We’ll set up a simple web application (e.g., using Python with Flask or FastAPI) that can receive the HubSpot webhook, process the data, and generate a custom script.
Setting Up Your Knowledge Base
The RAG system’s power comes from its specialized knowledge base. This isn’t the entire internet; it’s a curated collection of your company’s most valuable information. For this sales use case, your knowledge base should include:
- Product Documentation: Detailed descriptions of each feature and its benefits.
- Customer Case Studies: Indexed by industry and pain point solved.
- Competitor Battle Cards: Strengths, weaknesses, and key differentiators.
Use a vector database like Pinecone or Weaviate to store embeddings of this information, making it easily searchable based on semantic meaning, not just keywords.
The Retrieval and Generation Logic
Your application’s main endpoint will execute the RAG process. Here’s a simplified Python pseudocode example of what happens when the HubSpot webhook is received:
from flask import Flask, request

app = Flask(__name__)

@app.route('/generate-script', methods=['POST'])
def handle_webhook():
    # 1. Receive data from HubSpot webhook
    lead_data = request.json
    lead_pain_point = lead_data.get('primary_pain_point')

    # 2. Query vector database for relevant context
    # (This function connects to your vector DB)
    retrieved_context = query_knowledge_base(lead_pain_point)

    # 3. Construct a prompt for the LLM
    prompt = f"""
    You are a helpful sales assistant. A lead named {lead_data.get('firstname')} from {lead_data.get('company')} is struggling with '{lead_pain_point}'.
    Using the following information: {retrieved_context}, write a friendly and helpful 45-second video script.
    The script should acknowledge their specific problem and briefly introduce our solution. Start the script with 'Hi {lead_data.get('firstname')},'.
    """

    # 4. Generate the script using an LLM (e.g., GPT-4)
    generated_script = call_llm_api(prompt)

    # 5. Trigger the next step: video creation
    # (This function will call the HeyGen API)
    trigger_video_generation(generated_script, lead_data.get('email'))

    return {"status": "processing"}, 200
This code effectively translates a lead’s problem into a focused query, finds the best solution in your knowledge base, and crafts a perfectly tailored script.
Step 3: Integrating HeyGen for Automated Video Creation
With a personalized script ready, it’s time to create the video. HeyGen’s API makes this process incredibly straightforward, allowing you to generate professional-quality videos programmatically.
Getting Started with the HeyGen API
First, you’ll need a HeyGen account and an API key. Their platform is designed for scalable video creation, making it a perfect fit for this workflow. Sign up and grab your API key from the dashboard to get started. If you’re ready to automate your video outreach, you can try for free now.
Creating a Video Template
To ensure brand consistency and simplify your API calls, create a video template directly within HeyGen. Here, you can define:
- Your Avatar: Choose a stock avatar or create a custom one of yourself.
- The Background: Use a simple office setting or a branded background.
- Text Overlays & Logos: Add your company logo and any other static visual elements.
Once you save the template, you’ll get a template_id. This is all you need to tell HeyGen how to style your video; the only thing that changes with each API call is the script.
Making the API Call
In your application, you’ll create a function to send the generated script to HeyGen. This involves a POST request to their API endpoint for video generation.
import requests
import os

HEYGEN_API_KEY = os.environ.get('HEYGEN_API_KEY')
HEXGEN_TEMPLATE_ID = 'your_template_id_here'

def trigger_video_generation(script_text, lead_email):
    url = "https://api.heygen.com/v2/video/generate"
    headers = {
        "X-Api-Key": HEYGEN_API_KEY,
        "Content-Type": "application/json"
    }
    data = {
        "video_inputs": [
            {
                "character": {
                    "type": "avatar",
                    "avatar_id": "your_avatar_id_from_template",
                    "voice": {
                        "type": "text",
                        "text": script_text
                     }
                }
            }
        ],
        "test": False,
        "caption": False,
        "title": f"Follow-up for {lead_email}"
    }

    response = requests.post(url, json=data, headers=headers)
    video_data = response.json().get('data')
    # Store video_id and lead_email to check status later
    store_pending_video(video_data.get('video_id'), lead_email)
Handling the Response and Updating HubSpot
HeyGen processes videos asynchronously. You’ll need to periodically poll their API with the video_id to check the status. Once the status is "completed", the response will contain the video_url. Your final task is to use the HubSpot API to update the contact record that started it all, populating your custom personalized_video_url property with the new HeyGen link.
Step 4: Closing the Loop in HubSpot
With the personalized video URL now stored on the contact record, the final step happens back in the HubSpot workflow.
Creating the Personalized Email
Add a “Send email” action to your workflow. Craft a simple, clean email that piques the lead’s curiosity. The video should be the star of the show.
Using Personalization Tokens
In the email body, use HubSpot’s personalization tokens to embed the video. Instead of just pasting the link, create a more engaging presentation:
- Take a generic screenshot of your video avatar and add a “play” button overlay in an image editor.
- Upload this image to your email.
- Hyperlink the image to the personalization token for your custom property:
{{contact.personalized_video_url}}.
This an-image-that-links-to-the-video technique dramatically increases click-through rates compared to a raw URL. Your email copy could be as simple as: “Hi {{contact.firstname}}, I recorded a quick video to address the point you made about [pain point]. Check it out!”
Activating and Monitoring the Workflow
With all the pieces in place, you can activate the workflow. Be sure to run a few test contacts through the entire sequence to iron out any issues. Monitor the performance of your workflow and the engagement rates on your emails. You now have a powerful, automated system for personalized outreach.
This entire process transforms sales follow-up from a chore into a strategic advantage. You’re no longer choosing between personalization and scale—you’re achieving both. That mountain of digital paperwork on Sarah’s desk? It’s no longer a burden. Now, Sarah isn’t just sending follow-ups; she’s starting meaningful conversations at a scale she never thought possible, all while she focuses on what really matters: building relationships and closing deals. This is just one example of how a thoughtful integration of RAG and AI tools can revolutionize a core business process. Ready to bring the power of AI-driven video to your sales process? Get started with HeyGen’s powerful API and see the difference for yourself. Try for free now.